Dave's Pages |
|
|
Dahlquist DQ-10
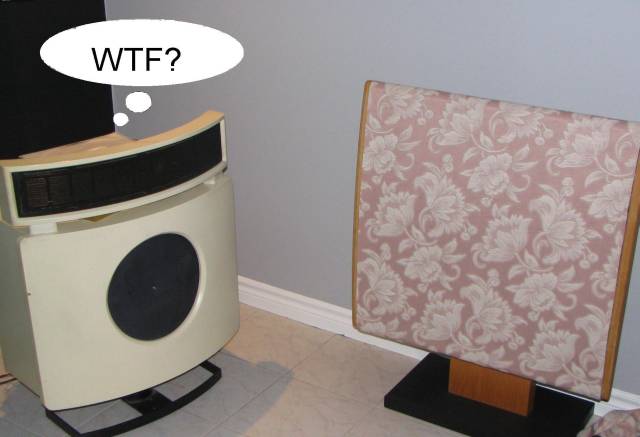
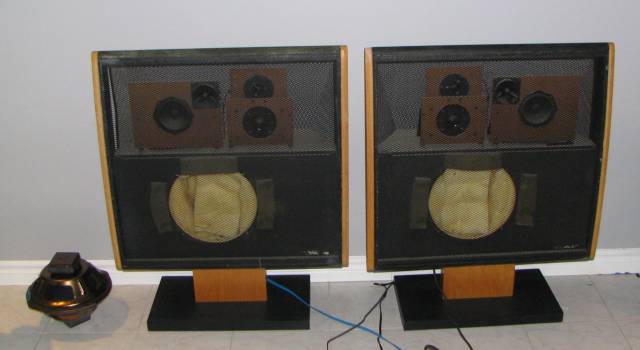
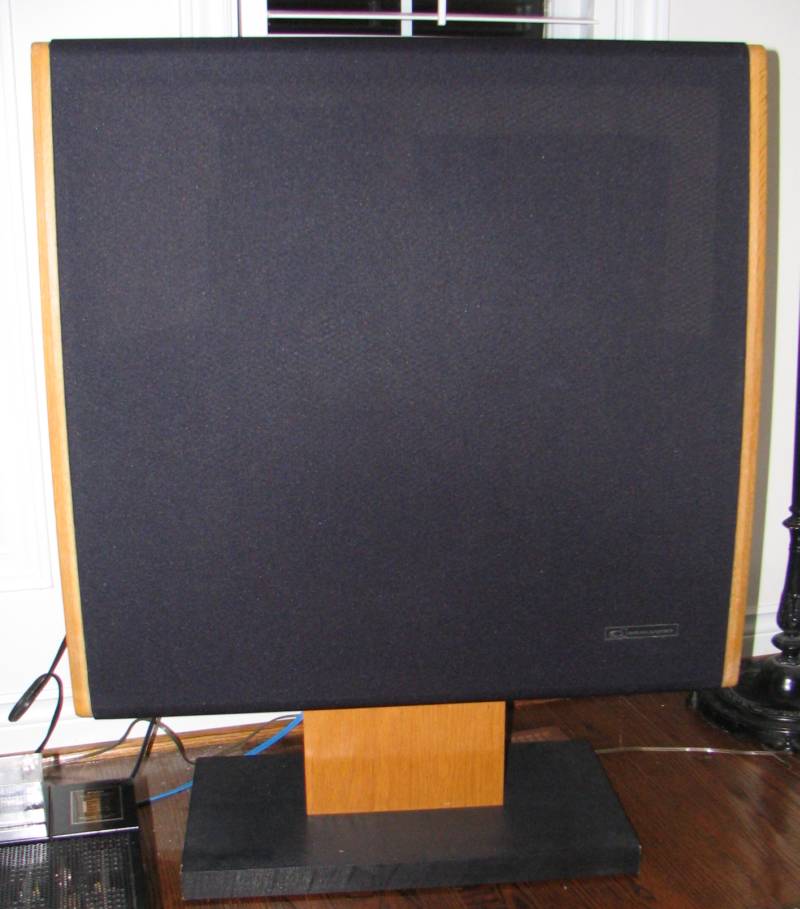
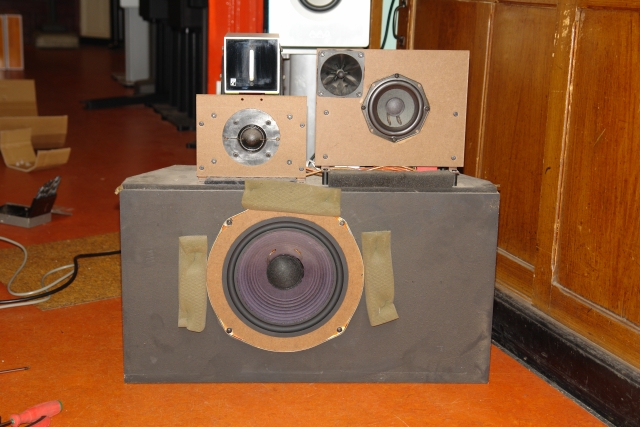
That's a B&W DM-70, clearly confused by one of a pair of nattily dressed Dahlquist DM-10s that showed up the other day. Don't laugh. Actually, go ahead, I did. They look funny and that pretty cloth could stop a bullet. These Dalquist speakers and a pile of old NAD components found me when a friend, moving, wanted to unload her late husband's stereo system. She offered to sell, I said OK, thinking that I'd help her out, sell the speakers, break even, and use the NAD amp and tuner in the workshop. Never is it that easy. None of the equipment was in great working condition, dirty pots, missing buttons, funny noises from the CD player. And that upholstery! Ugh. More projects. Anyway, the price was reasonable, and I'd already committed. DesignSomething of a mid-fi footnote in the vintage audio world, the Dahlquist DQ-10s (with proper grill cloth) look cool. I had always thought, based on seeing one pair.. once... in a pawnshop... that they were a poor man's Quad ESL wannabe. What do I know? Perhaps I'm being harsh - my apologies to the fanatical.
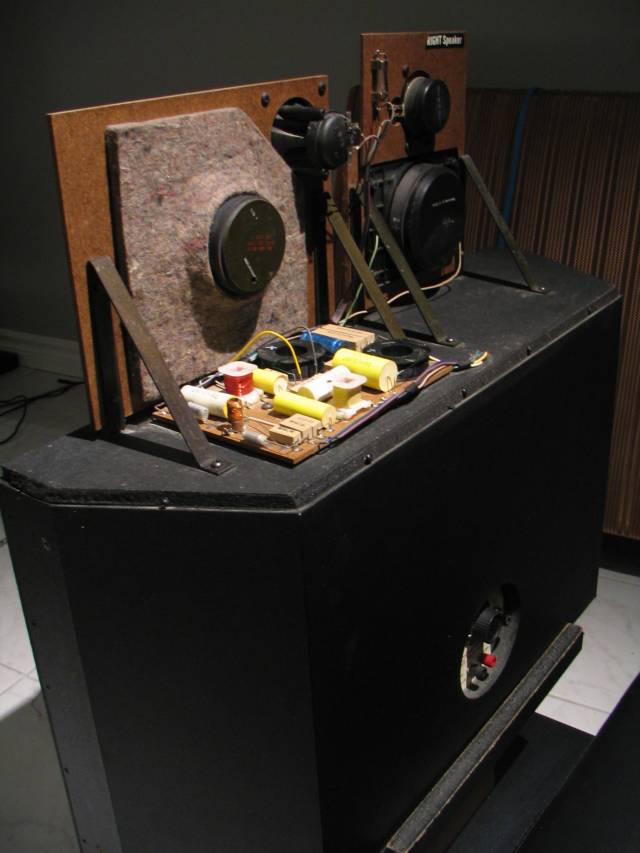
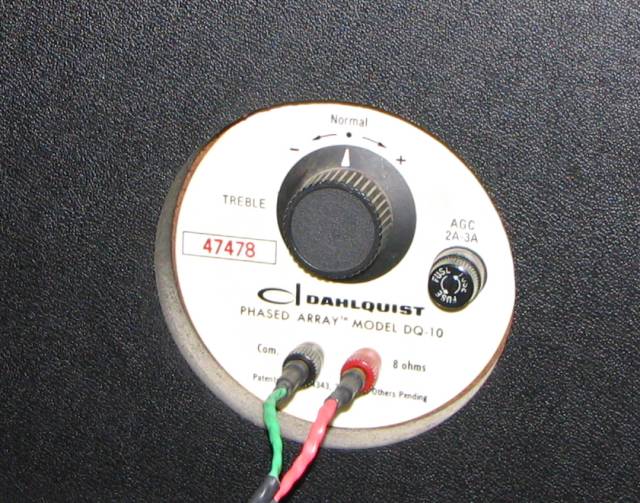
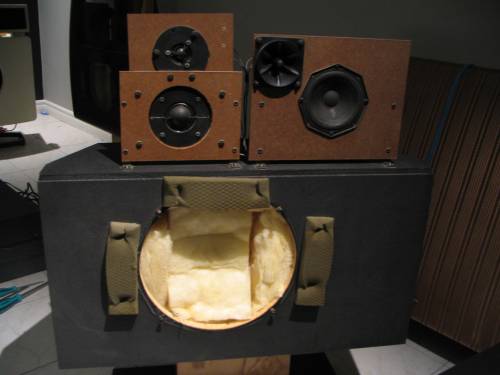
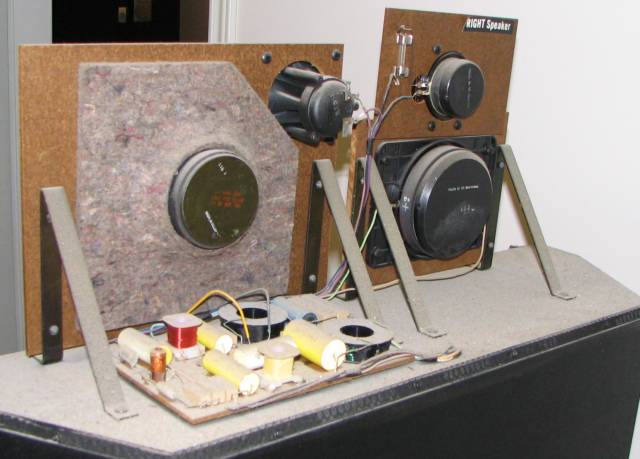
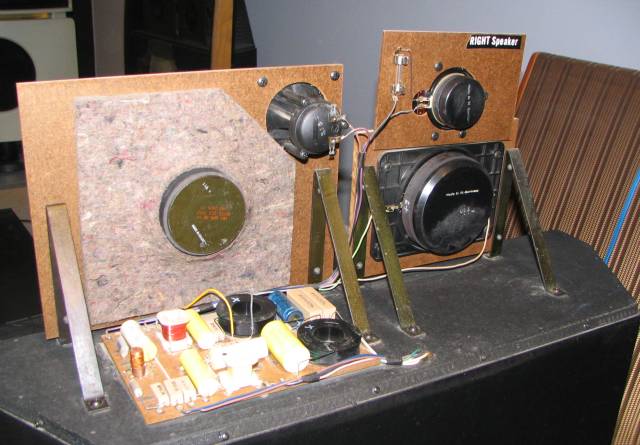
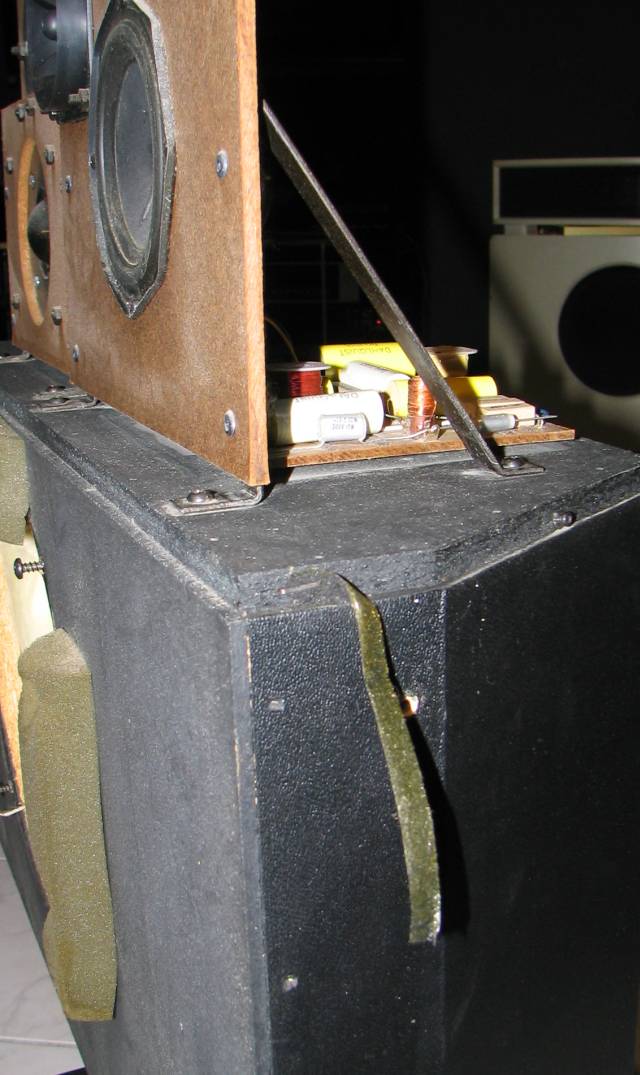
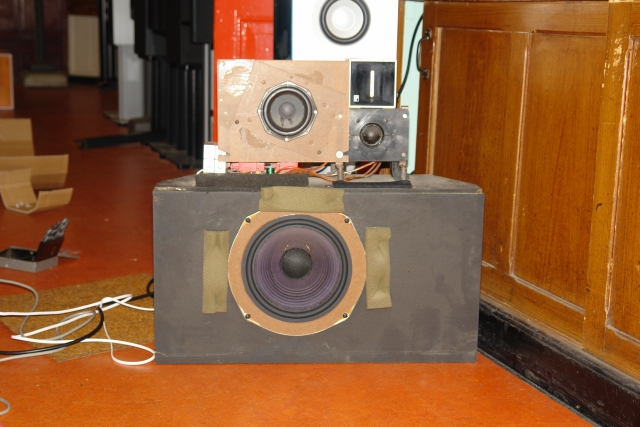
Designed by Jon Dahlquist and Saul Marantz, they are unapologetically large, suggesting that the designers were willing to accept a smaller served market in exchange for performance. They are kind of a wild design, with no fewer than 5 drivers spread over a large frontal area, giving a retro-cool appearance. The bottom section is a woofer in a sealed, fibreglass damped enclosure, The mid and hf drivers are "time aligned" - mounted on individual masonite baffles, set at varying distances back from what would be the front baffle "plane" in a conventional speaker enclosure. As if that wasn't enough, they were intended to be used with a passive sub and crossover, both of which show up on ebay from time to time. Overall, one would expect a very low WAF! While DQ-10s aren't highly prized collectibles, they are noteworthy enough to be fondly remembered by many, and they make many recommended ("for their time") component lists. They have some glowing, mostly nostalgic internet references, particularly relating to imaging, and are regarded in the audio press as a milestone design. I have also read that they really require the use of a subwoofer to be fully appreciated. Unfortunately, any cult following appears to be very small and there is little information available for those seeking to restore. I hooked 'em up and they worked, sort of. One had very noisy bass the other had less noisy bass. As expected the speaker surrounds were rotten, one much worse than the other. I can already tell they require lots of power and which supports their reputation for inefficiency. (86db apparently, which may even be a stretch) I can't believe they were designed to be used with tube amps as is claimed on some internet discussion groups. Doesn't really make sense... such amps would be huge and expensive, and these were manufactured into the 80's, when transistors had long since become the norm. Anyway, these DQ-10s had been paired with an NAD 2700, 200wpc. A pair of these amps bridged to 400w each would provide loads of oomph without breaking the bank.... The serial numbers are consecutive, 47478 and 47879, and the woofers magnets are dated June 1983. You can see the original oak veneered stands. I also have the original feet. Notice that the speakers are symmetrical opposites of each other, and are actually labeled left and right. Earlier production were not 'mirror imaged" in this way, and this has become an oft recommended mod. With the exception of C1 - an 80mfd non-polarized electrolytic, the crossovers feature film caps, private labeled for Dahlquist. Earlier DQ-10s apparently featured more, possibly all electrolytics, which would likely require replacement after a quarter century in service. Grill Removal and Disassembly.Removing the grills is
easy. Remove the 2 large phillips wood screws from each side and the four tiny phillips
screws from along the rear top edge of the back. It might be just as
easy to remove the cage which protects the drivers and crossover at this stage.
Just a few more little screws. Pull the grill assembly
forward - it lifts right off. The cloth is clamped under the side trims,
so with the grills removed you can remove another 3 screws per side to remove
the hardwood (in this case oak) caps. Sue had glued the edges
onto the metal grills, and the original grill cloth was undisturbed beneath the
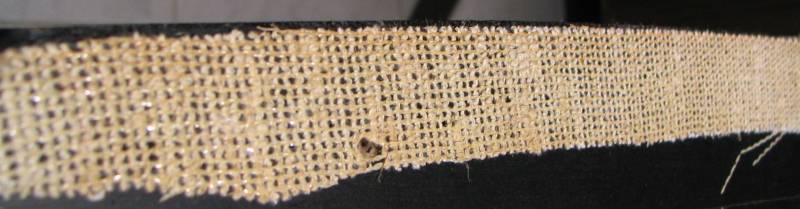
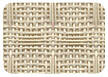
caps. Regnar/Dahlquist claims to be the long lost stepchild of the original company, and they reference 3 grill cloth colours on their site: black, polar white, medium grey. My original grill cloth was none of the foregoing, and was a sand/beige material. I sent them an email on the subject and never heard back.
Closest to original I found was Acoustone FR 400 series material, pictured at left. The original shade is between those two. It is available from www.acousticalsolutions.com Seems like a good source but you must buy a minimum of 5 yards of material! Keep looking...
I ended up going with simple black grill cloth (http://www.partsexpress.com/pe/showdetl.cfm?&Partnumber=260-335) from www.partsexpress.com . Good price, easy to order. Woofer surrounds are available there too. New grill cloth was installed with a staple gun and some cardboard shims along the top edge. It helps to hang the grill over the back of an appropriate chair as the job is a bit awkward. CleaningYuque. They do get dusty. Removing the rear cage and doing some gentle work with a paintbrush and vacuum cleaner produces decent results, then a wipe with simple green on a damp rag does the rest. Mundane, but done, ready for new dust. The surfaces against which the metal mesh cages rest has a foam gasket material, no doubt to prevent rattles. This stuff had long since rotted and needs replacement.
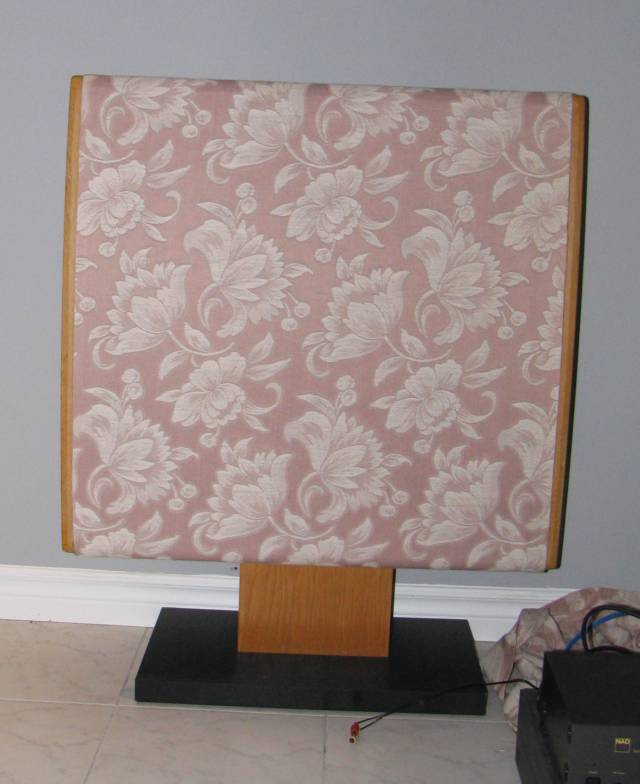
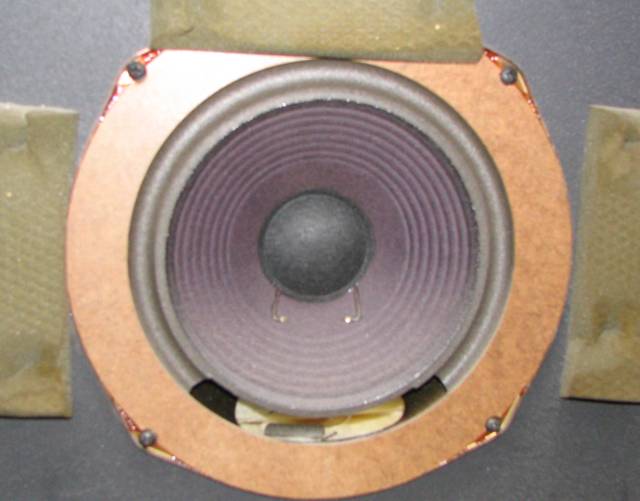
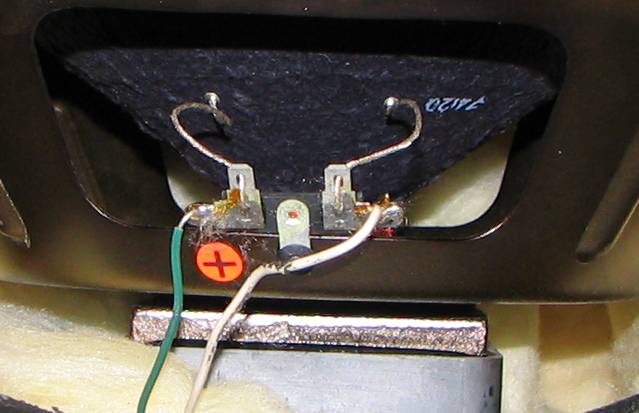
Woofer Removal and RepairIf you have a pair of DQ-10s which have not had the woofer surrounds replaced, expect that they will need it. Don't pump up the volume! Strange looking driver. 9.5" cone in a 12" basket, difference made up with more masonite. This woofer was shared with another, possibly better known speaker model made by Advent . Make a note of the colour code to the speaker terminals. There are a few refurbishment options - replacement of the foam surrounds, reconing (if damaged) and replacement with similar but not identical new drivers. Costs for the pair range from $50 (parts only) to $300+ for replacments or a full, loving rebuild from Regnar. (seems totally nuts to me). Most will only need the foam surrounds replaced. I sent the woofers to Santon Audio in Markham to be refoamed and tested $120 total for the pair. Not a bargain, but local. Good guys too, and they did a great job with the correct reverse rolled surround orientation etc. ReassemblyThe wood on the frames had been splintered a bit when Sue pounded in the carpet tacks to secure the upholstery. A little methodical clamping and gluing fixed that. I replaced the foam gasketing around the rear metal screens with weatherstripping material from home depot - 3/8" wide black closed cell foam. Perfect stuff. I used a staple gun to refasten the grill cloth, reversed the disassembly procedure. Easy job. Below is one of the finished speakers.
ListeningI take back some of what I said above. While they aren't as good as the B&Ws or quads, they aren't bad either. In our big living room, they certainly work better than my Mordaunt-Short bookshelf speakers. I found that the Piezo tweeter sounded awful, so I unsoldered it and the sound improved immensely. The DQ10s lack the realism of electrostats IMO, but they have decent bass and do a lot of things pretty well. Using them with a McIntosh MC100 or NAD2700 they can play louder than I need or like. 100 quality watts per channel should be plenty. Will try with Quad 405 as well. The DQ10s will slide right off their stands, so I used a little blu-tack to hold them in place. Further experimentation with other components will probably find a suitable combo, but overall I've been enjoying the DQ10s. Does anyone have any technical information, schematics, or original owners' manuals they would be willing to email to me? Please? I will post here for the benefit of others. Thanks!
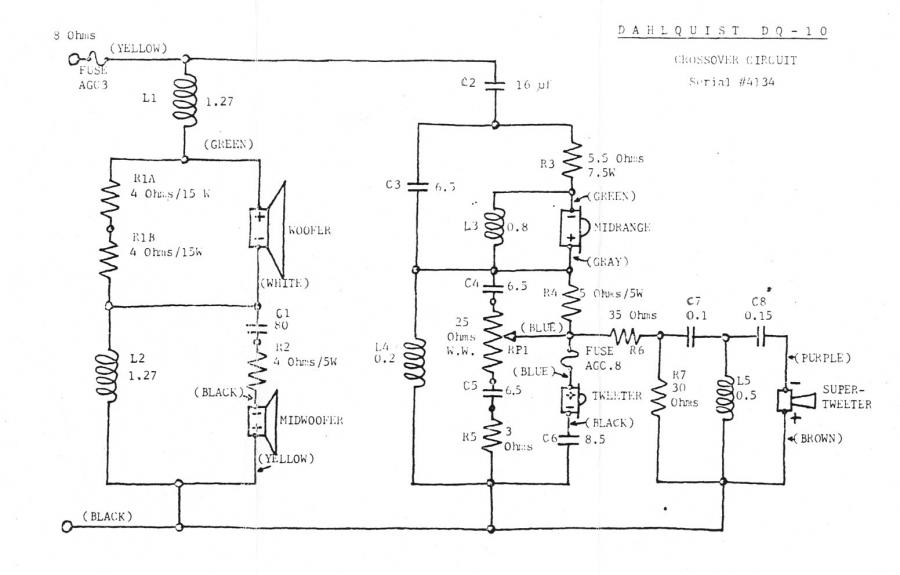
DQ-10 Tech in no particular orderHere is the DQ10 crossover schematic:
Here is an email thread started by a question from Jim H in New York.
From:
Hi Dave,Sent: Thursday, December 04, 2008 4:49 PM Subject: Dahlquist Speakers I recently picked up a pair of Dahlquist DQ 10's, and in researching them I came across your helpful site (thanks). I'd like to ask you a few questions, for advice, if you don't mind, and let me say that I am not used to digging into stereo equipment very much. On the front cloth, to replace them,I can see how they wrap around the bottom, but how are they attached once the wood trim is removed on the sides, glue? And I didn't see any screws to give access to how to attach them on the top, you mentioned cardboard shims... how did you do this? on the woofers, I looked up a few refoaming outfits in the States, and one, watkinsstereo.com, said this: There is a small enclosed air space behind the dome where the air is compressed and rarified as the cone moves back and forth. The dome's stiffness and it's resistance to air flow through it are crucial to the amount of low bass. The dome is also the source of sound in the speakers upper range and determines frequency response in that area. The usual refoaming process requires cutting out the dome to gain access to the voice coil, such that it may be centered in the magnetic gap with shims during the refoaming process. This destroys the original dome, requiring replacement with a new and different one, since original domes are no longer available for older speakers. The only way to retain original performance is to leave the original dome and its original attachment to the cone intact. We do this by centering the coil in the magnetic gap electronically with test tones. The dome and its attachment are left completely intact and as original, thusly retaining the speakers original bass and frequency response. This guarantees the speaker will sound the same as when new. Does this sound right to you? I asked them about having to resolder the woofers when I got them back (because mine are soldered in) and they said I could cut the wires 2 inches from the connection and they'd provide a means of reattaching them without soldering... What would you suggest. Did you cut yours, or melt the solder and remove them and then resolder them? Thanks in advance for your help, Jim H, NY
Hi Jim,
No problem - but do understand
that I am not an authority of any sort.
The shims might be more
accurately described as wedges. I rolled the cloth around two thcknesses of
corrugated cardboard and used another thickness to stuff that into the
groove in the top of the speaker frame. The cardboard compresses enough to
wedge the cardboard/cloth sandwich into the groove. Make sense? I then
used a staple gun to attach the cloth to the sides.
That theory from watkins may
have merit, I don't know. It all depends on why you enjoy the hobby.
I was an audiophile gear nut for
awhile, and was able to notice and appreciate many of the tweaks that I
applied, though I was always skeptical about some of the sillier stuff out
there. I take the advice of internet cheerleaders (however well
meaning) with a grain of salt. I do think that the better the gear, and the
more thoughtfully designed the room, the more detectable are the
improvements, (and deficiencies) especially when you get into REALLY good
gear, some of which I own and enjoy. In other words, IF dq10s are really
excellent speakers, and IF every other variable (including the room) is
equal to or better than the DQ10s inherent excellent quality, then precisely
replicating the original damping and original cone placement may be
discernible. As you may have guessed, I really doubt it is very
significant. These were decent but not super high end speakers and the
woofers were cranked out on an assembly line in the days before really good
computer controlled equipment was available, (so units probably vary
somewhat) plus the foam itself has been replaced (altering the damping to
some small degree) with stuff that - we hope- is of a different formulation
than the short-lived originals. In any case, the material ages and
properties change over time. Also, your couch is in a different place
than mine.... ;-) You get the idea. I do all the practical things to
optimize my system and room, and I have the best gear I can justify, but
after that I just relax and enjoy. If I really want music to sound great I
enjoy a glass or two of nice wine while listening. It is after all, a
psycho-acoustic phenomenon. (My .02, for free, and worth every
penny!)
Soldering is easy, but you do
need to know how to do it. There is less risk of overheating something and
doing damage if you solder or otherwise connect to the wires as you
describe, but that is the only real reason to do one or the other. I have
been happily soldering and desoldering wires to speakers since I was around
14 years old and have never damaged one.
I had both my dq10s reconed at
Santon audio in Markham ON (near Toronto) for $120 Cdn, they sound fine to
me. It may not be too big a deal for you to ship them to Canada, and you
now have 20% greater purchasing power WRT the Cdn dollar.
Good luck with the project.
Dave
One from SteveSent: Wednesday, November 19, 2008 1:13 PM Subject: DQ 10's
Hi Dave,
Read your overview of the DQ 10 rebuild - Very nice!
I recently came across a set
that are in nice shape. The owner also had the crossovers modified by a
high-end audio shop at some point years ago.
All the caps and coils are replaced with some high end stuff. The coils are air core inductors as well. The speaker wire running to the drivers is a silver high end wiring also. I have come across some schematics for the crossover. Not sure if you would like them. They are in PDF. I also wish I could find some more specifics on the mods that were done to this set. I guess I can just compare the values and figure something out. I just hate recreating the wheel. Anyway I do not have experience with these speakers prior to this but I can say that this set sounds great. 100 watts/channel and they do sound nice. I have run them on 200 watt/channel amp and no problems with a little extra power.
They were also turned into
the mirror imaged set. They moved the mid/tweeter assembly on one
speaker. I am wondering also what is the intended position the speaker
for proper L & R orientation?
Regards,
Steve
Hi Steve,
Thanks.
>>snip As mentioned on my site, I was pleasantly surprised by the sound. The upgrades would help to some extent I'm sure, but I don't think I'll bother with mine, the room I am using them in is deficient in many ways, so the effort would be a waste, and I have other speakers in my listening room.
My DQ10s are factory mirror
imaged and labeled left and right. They are oriented with the
tweeter inside and piezo/midrange outside if that makes any sense.
Dave
One From Wieger
From: KNOKKi audio technologies
[mailto:KNOKKi@scarlet.nl]
Sent: Saturday, December 20, 2008 8:22 PM To: Dave Syer.net Subject: Re: schematics DQ10
Just finished 'refurbishment' of DQ-10s
(serial 38697 + -8). Supertweeter was already disconnected and
tweeter + fuse were replaced by a Decca ribbon tweeter.
What I did:
- new rubber surrounds for woofers (iow
NO refoaming); will charge 220 Euro's a pair including P&P within
Europe
- new rearrangement of units on top of
woofer keeping 'phased
array'-alignment in the Z-plane in tact but baffle of midwoofer has
become smaller (see photo's)
- multi-stranded speaker cables directly
connected to the X-over (i.e., connectors and fuse are 'by passed')
- variable 25 Ohm's resistor replaced
by two 12 Ohm resistors on the X-over (i.e., treble control fixed at
12 o'clock thus not variable any more)
- wiring to woofer replaced by shorter
multi-stranded wiring
I have never heard the original DQ-10s;
neither have I heard a pair which has been modified by a specialist
(and I have to say that Regnar doesn't give me much confidence in
this respect as they are actually supplying fuseholders and the
potentiometer, items which in my view should always be discarded).
So I can only judge my own work. What I do hear is a speaker which
is may be relatively easy on the ear and ready for extended
listening sessions (i.e., phase behaviour seems indeed OK), but
which will be bettered in most respects by any decent modern design
upwards of 200 Euro's / US Dollars a pair. Transient behaviour
(impulses) and low-level resolution quite bad, too much colouration
in the lower registers and top-end is lacking (but I'm not sure the
Decca mod is decently done). For use in larger rooms in modern
houses / interiors (i.e., concrete walls and floors, glass
furniture, double glazing, no curtains etc) and with typical
high-voltage class AB amps (Yamaha, Onkyo, Denon, etc.). I rated
them with Pass XA160.5s: not recommended!
You can hear (and see!) that it is a
design from a time when real time computer measurements (e.g., FFT
analysis) could only be dreamt of. I would say that the biggest
problem of these speakers is that too much energy is stored in them.
Cheers!
Wieger Fransen
KNOKKi audio technologies;
www.knokki.com
Wieger - What do you
by stored energy - lack of compliance/too much damping?
##Too much energy in the system
would show up in a FFT-analysis in the Z-plane. The more
energy the system stores, the more time it takes to die out
in the time-domain (the waterfall in the FFT-plots show a
bigger extension). An ideal system would react on a pulse in
a start - stop way; a system which stores energy reacts on a
pulse by start - stoppppppp. Energy can be stored in the
units (inertia icw compliance), the enclosure (colouration),
damping (but this does not give energy back easily) and the
filtering (high loss factors); though you should ask the
experts for a more exact answer.##
From Larry:Hi Dave- If you are still needing info on DQ-10s, there is a yahoo group you can join and get access to posted schematic diagrams of the crossover. After joining, click on the Files in the left hand column. Just search for Dahlquist groups on yahoo and you will see it at the top of your screen. I will be upgrading a set for a friend in the near future so I was doing some research. He has the mirror image version with the newer capacitors. From reading and seeing the crossover in ebay listings, the largest value capacitor is still an electrolytic, 80 mfds. It is the blue one in your crossover in the upper right corner to the right of the inductor. I would change that to a metalized poly capacitor. I use several smaller values in parallel to equal a large value for better sound, like 4 20 mfd. The signal passes through faster and they sound better. I would put bypass caps on all of them throughout the crossover, plus replace the resistors with Mills or Dayton high end resistors from Parts Express. I wonder how the quality of the caps in the mirror image DQ-10s compare to other brands. Parts Express has their Dayton metalized caps with a 1% tolerance that aren't that expensive. The gauge of wire to the woofer might need to be increased. Maybe all the wire should be. I haven't seen my friend's speakers for months and I wasn't studying the crossover at that time. I want to put Deflex panels inside the woofer cabinet instead of the fiberglass or whatever may be in there. I have used it along with Acousta Stuf(this alone sounds better than fiberglas), but not exclusively Deflex. From reading ads it is supposed to deaden reflected sound so well there is a 50% increase in energy. I assume the bass will be cleaner, deeper and more detailed. I have deadened woofer and midrange driver frames with Plasticlay or rope caulk and hear quite an improvement. I put some on the inner side of the spokes so sound isn't bounced back through the cone, and on the outer side of the spokes and magnet. Deflex has round pads for woofer magnets, corner blocks and other kinds of sheets. www.percyaudio.com has the best selection of Deflex and many other higher end audio parts. I would also try covering the rest of the front of the woofer cabinet with foam and see if it sounds better. The back side too. A wide bare panel like that can cause too many reflections. I covered all the spaces between the drivers on my upgraded Crown speakers by putting thin foam sheets under the grill cloth on the masonite grill board. They sound better with the grills on now. You will get better sound just putting modern grill cloth on your speakers. My friends has the standard black cloth all speakers have. The old cloth in your photos looks more like burlap, which has to block a lot of the air movement. The original cloth on my Crowns looked like upholstery cloth for a sofa. Good luck.-Larry
|